Wikipedia

Search results

Sunday, 10 September 2017

Repair Car Lighter

Repair Car Lighter


Buying a used “old” car may have several drawbacks; some of them are aging parts. On electrical side, there is usually just a “simple” breakage on connection. Such as: loose connection, rusty/oxidation, or rotten cables (due to heat or humidity exposures).
Following tutorial is an example of malfunctioning car lighter repair. The impact of this malfunction is not functioning USB charger which is plugged into it.


 Tools and Materials Preparation:
  •       Multimeter (Voltmeter and Ohmmeter)
  •       Pliers
  •       Cutter/file
  •       Contact Cleaner or any anti rust spray (such as WD4o*)


Repair Step:
  1. Measure voltage on (+) terminal and (-) of the lighter using voltmeter. Normal voltage shall be greater than 12V.


a.      If it is 0V, there must be loose wire or connection. Measure resistance between both terminals. Resistance must be 100K Ohms, or oL (no connection, there must be no short circuit). If there is short circuit, trace “wild connection” which causes the short, and break it. Change the Fuse after the wild connection has been broken.
b.      If it is less than 12V, there is usually an oxidation or rust at connecting terminal. The example on my case is only 9V which is insufficient to power up USB Charger.


    2. Unplug and measure the voltage at connector behind the lighter. If it is greater than 12V, meaning the voltage up to the connector is good. The damage location is at the lighter after the connector.


         3.       Remove cover panel of the lighter by pulling it straight forward: 


    4. Measure the terminal connection resistance:
            a. Measure terminal connector (-) to the body of the lighter using Ohmmeter. The resistance must .
               be less than 3 Ohms. 
           b. Measure terminal connector (+) to centre screw (terminal) of the lighter using Ohmmeter. The 
                 resistance must be less than 3 Ohms.


             c.  If terminal resistance above is high, meaning there “damage” is at the terminal. The example on my case is the resistance between terminal (+) to the centre screw intermittently varies between 17 to 150 Ohms. This means there is bad connection.


             d.  Trace every connection using Ohmmeter, where is the location of the problematic resistance:


      5.      After the problematic resistance location is found, repair the connection at the place as following: open the crimping, scratch the metal contact surface using cutter or file from rust/oxidation.
      6.      Fasten it back using pliers.


     7.      Spray Contact Cleaner/anti rust WD4* to prevent the rust growing back. Do not wipe off.


     8.      Re-measure the resistance at the ex-problematic location to ensure it is already less than 3 Ohms.

     9.      Measure the resistance between (+) and (-) too. There must be no short circuit (the resistance must be above 100 Kilo Ohms, or oL (no connection)).

     10.      Install back, check the function:

Profil Ceria:
Baru kesampaian memiliki Ceria di 30 Juli 2017. Kondisi 2nd murah-meriah, dengan beberapa PR yang perlu di-optimasi. Kesempatan untuk belajar bertahap, dan mencicil biaya perbaikan pelan-pelan, daripada kredit Mobil Baru melibatkan bank/leasing/rentenir = dosa riba :[ 
 
Wallahu musta’an


Thursday, 4 August 2016

How I Made LED Strip Light (for Aquarium or Anything Else)


assalaamu'alaikum :)
above is the photo of my aquarium after LED strip lighting installed. nice :?

Here are the steps I did:
  1. bought "LED 5730 Strip with built in aluminium heatsink strip" from tokopedia.com. it is only priced IDR 30,000/meter (contains 72 LEDs).

   according to the seller, it was 36 Watts LED. however it is impossible LED is setup in its' max power limit. Otherwise it is already dead :).

2. cut the LED strip into 2 halves using cutting pliers, then glue onto PVC rectangle conduit (IDR 3,500) using Silicone glue (IDR 5,000). note: aluminium bar (15,000 / 6 meters) is better since aluminium can help dissipating heat and as well as very strong metal frame for the LED.

3. Join the PVC/aluminium frame using superglue or rivet nail. 

4. bought second hand AC-DC Adaptor (IDR 25,000: 24 volts 2 Amperes, because I solder the LED in series 12Volts x 2)


5. OK, then try it up on my floor: quite bright!


6. Set it on my aquarium.... awesome


at night, it induce photosynthesis too:


Photosynthesis video: you can see the Oxygen bubbles were coming out from the leaves!!!


Thursday, 30 June 2016

How I Made My House Gate of Aluminium

How I Made My House Gate of Aluminium


Hi friends,
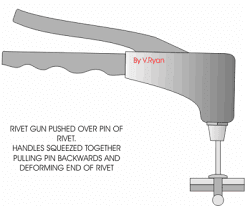
this project is something I newly learnt and practiced about 3 months ago, which is about aluminium tube assembly and joining (which is: RIVETING).


Riveting is very interesting, since the process is quite quick and strong. it is also neat and state of art.

Further benefit: I saved money of around IDR 1,000,000 (US$ 80) with making this myself rather than ordering a welded iron gate. Yet the most interesting this is still I can create is myself; such an excercise, hobby and creativity :)

Ok, let's take a look how I made it:

Constructed the lock handle & safety:


Mounted the padlock on pillar using wood and screw:


the lock from front side:


Joined 2 aluminium square tubes using rivet nail:


Mounted the plastic cover/shield to aluminium square tube using black (UV resistant) Cable Tie:


The other side of rail lock: using Hook to hook metal clamp:


Lower side is the same:


I mounted 4 wheels using screws to the gate base:


Operation Photo:)


What a nice DIY. isn't it?  :D

Monday, 16 May 2016

Cheap and Small Aquaponic Auto Siphon (Growbed Space Saving) by Mohammade9


Cheap and Small Aquaponic Auto Siphon

Assalaamu 'alaikum,
This project will be useful for whose space within growbed is a problem, or have only a "small" growbed.
Just like my problem, I intended to "start practicing" in aquaponic world using smaller scale growbed. Searched around reference from internet, mostly recommend BELL SIPHON.
Unfortunately this kind of siphon occupies too much space within growbed. This is not so kind for my small growbed :) Because we want to grow as many plantation as possible :)

Step 1: Make Your Solid (Grow Media) Filter using Small Bottle!

Picture of Make Your Solid (Grow Media) Filter using Small Bottle!

IMG01045.jpgIMG01046.jpg
IMG01047.jpg
IMG01050.jpg


IMG10348.jpg


OK, this is important point since effective growing space in growbed is to be made as much as possible.
  • Search for small unused plastic bottle (I recycled ex. cajuput oil bottle - made in Indonesia). Wash it thoroughly to ensure no harmful chemical left to your fishes and plants!
  • if you do not have small plastic bottle, you can use long bottle then cut the mouth and the bottom from the body (see above 2nd - 4th photos), then join them together using glue.
  • once you select the plastic bottle, drill some hole (5th photo). I found punching holes using heated nail (6th photo) is neater than using hand drill. And it was also faster.


Step 2: Install Your Solid Media Filter

Picture of Install Your Solid Media Filter


IMG01056.jpg


    IMG01057.jpg
  1. Drill a hole at the water lowest level of your growbed. Mine is around 3cm from growbed base. Enlarge the hole using your drill by moving it around until close to your bottle Outer Diameter (tight-fit is better/stronger, Photo 1)
  2. Insert your small bottle (Solid Media/Gravel Filter) to the hole, apply glue at the interior and exterior
note: I found small water leakage on this gluing process is not critical. This siphon is still working fine even with small leakage.

Step 3: Build Your Outer Siphon


1.    Shape PVC tube as per Figure 1 (U Siphon). You can use elbow for more beautiful look (Figure 2). However I prefer using “heat and bend” method, using what I have on hand to minimise cost and shopping time.
2.    Join the “Water Lowest Level” end to your “Solid Media Filter” using glue. If both diameters are tight-fit, you can skip glue. Small water leakage is fine. My siphon is still working fine though it has small leakage.

Note:

  • ·         There is one other good thing about tight-fit mechanism; you can rotate the siphon tube to adjust “water highest level”. It is feasible though the cycle is running.
  • ·         90° bend at outlet is optional, to ease the auto siphon to start. I removed this in my 2nd siphon. If you remove it, ensure the “outlet” is kept below “Water Lowest Level”. Otherwise, your siphon will not stop at intended lowest level.
  • ·         “Water Highest Level” determines the maximum level of water in your growbed. It shall be around 5-10 cm below media for good aquaponic result: avoiding invasive algae growth. Good indication for this is when you can see growbed media top is dry, then algae will never grow on it.
  • ·         “Water Lowest Level” determines the minimum level of water in your growbed. I set mine around 4 cm from bottom of growbed. This space is for nitrification bacteria to live in.
  • ·         Best minimum grow media depth for all kind of veg is 30 cm (ref: FAO).
  • ·         ½” PVC tube is actually too big for small growbed. The “ebb and flow” cycle become too short for my small growbed. You can use smaller tube if it is available in your country. Other non-degradable material is OK to use (e.g.: stainless steel, brass, anodised aluminum tube)


Step 4: Test and Use It!


Flow water into your growbed tank before adding media (Figure 1).
Ensure the “ebb and flow” cycle is running correctly at intended highest and lowest level. If no, adjust the inlet water flow using ball valve.
Too fast inlet water flow will cause siphon never stop, too slow will cause siphon never start.
Once you are sure the cycle is consistently running, you can add media. My siphon is still working fine till today (6th day: Figure 2). 


You can see the sprouts are growing (Figure 3).

Finally, feel free to leave a comment or post a question of any problem you have with your siphon. I can also barely answer a question about “bell siphon” J.

Monday, 9 May 2016

Super Cheap Aquarium Cleaner

Super Cheap Aquarium Cleaner
I also share this small project in instructables:

http://www.instructables.com/id/Super-Cheap-Aquarium-Cleaner

This project will inspire you a cheap alternative way to clean your aquarium inner side.

Step 1: Prepare your material and tool

Picture of Step 1: Prepare your material and tool
Here is list of materials needed:
  • Any hard and long stick, minimum same length as your aquarium depth.
    • I recycled paint roller stick for mine
  • Dish-washing sponge (usually come with 2 sides: soft and hard).
    • price: IDR 2,000 - 8,000 (below $1)
Tools needed:
  • mini screwdriver to punch the sponge
  • cutter/scissors to cut a groove the sponge

Step 2: Prepare the Hole and Groove

Picture of Step 2: Prepare the Hole and Groove
  1. Punch the dish washing sponge using your mini screwdriver, follow the pattern of your stick.
if your stick made from metal, it could be re-shaped by bending it over and around.
2. cut the sponge with your cutter/scissors, also follow the bending pattern of your stick.

Step 3: Assemble Them!

Picture of Step 3: Assemble Them!
Iinsert your stick tip into the hole you punched, and slip it to the groove you cut as shown

Step 4: Test it!

Picture of Step 4: Test it!
IMG10351.jpg
It is done! test it by wiping into your aquarium wall glass.
IMG10350.jpg
It should be quite easy, even my 5 years old daughter could do it easily :)
feel free to leave a comment or suggestions :)